My Neighbor Learned This the Hard Way. Last spring, my neighbor Dave decided to repaint his house. He skipped the primer because he figured the paint had primer built in. By August, he had peeling patches everywhere. By October, he was scraping and beginning anew.
I felt bad for him. But honestly? I wasn’t surprised.
Here’s the guide about exterior paint and primer. These work as a team. If you miss any of these, the entire job will fail. It’s not a suggestion. It’s chemistry.
So if you’re planning to paint your home’s exterior, stick with me. I’m going to walk you through what actually works. No fluff. No textbook talk. Just real advice from someone who’s been there.
Why Exterior Paint & Primer Isn’t Optional (Despite What the Paint Store Guy Says)
Walk into any hardware store, and someone might tell you, “Oh, this paint has primer mixed in. “You don’t need a separate coat.”
Don’t believe it.
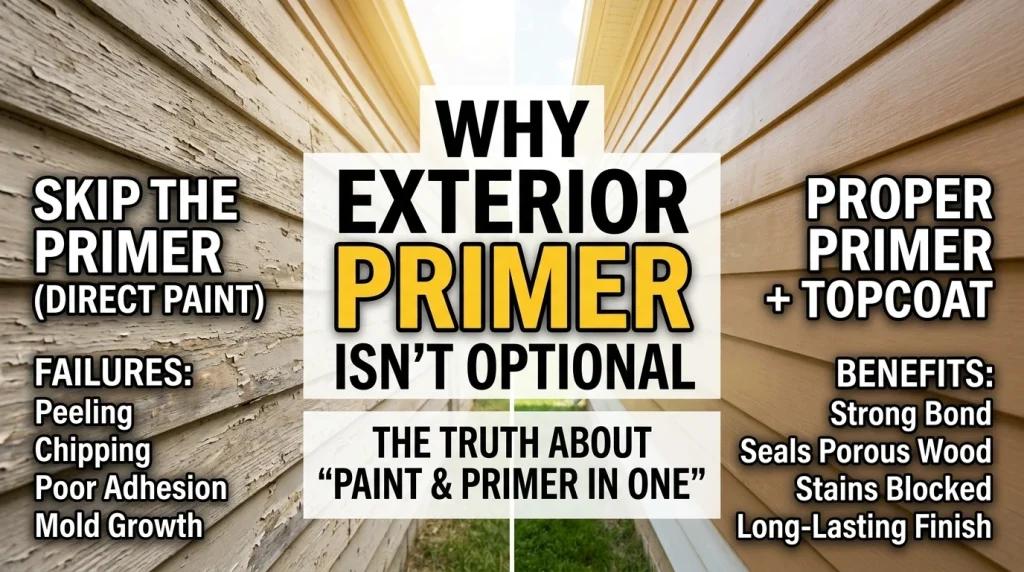
That “paint and primer in one” stuff? It’s fine for touching up a hallway. But for exterior surfaces that face rain, UV rays, and temperature swings? You need the real thing.
Here’s why primer matters:
It seals porous surfaces. Bare wood and masonry soak up paint like a sponge. Primer fills those pores so your topcoat sits on top instead of disappearing into the material.
It creates a bond. Paint alone can struggle to stick to certain surfaces. Primer gives it something to grab onto.
It blocks stains. Got water stains? Knots in the wood? Tannins from cedar? Primer locks those in so they don’t bleed through your fresh paint.
It protects against mildew. Quality exterior primers include mildewcides that fight growth from the start.
Dave skipped the primer. Dave is now scraping his siding in the cold. Don’t be Dave.
Picking the Right Primer for Your Project
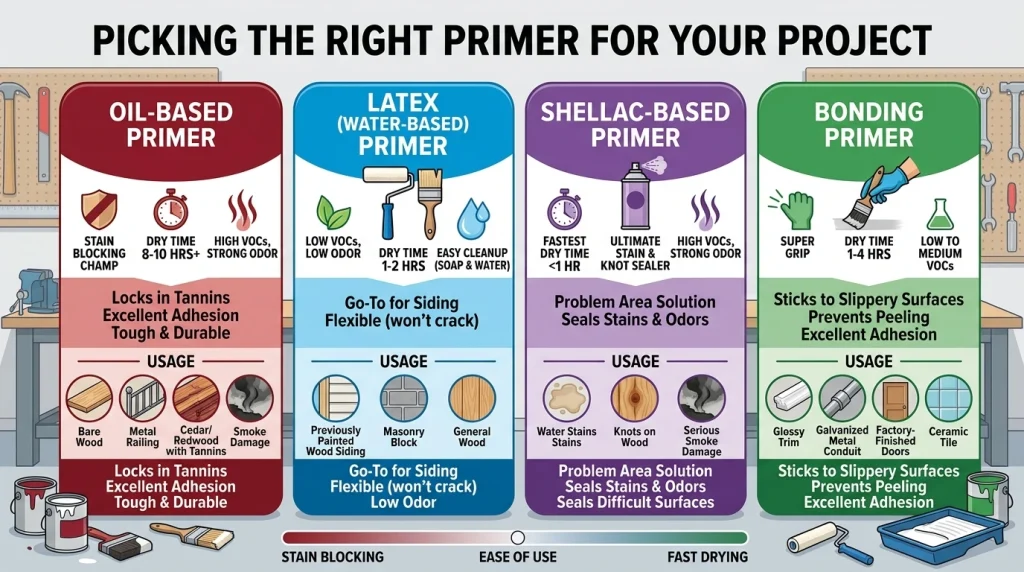
Not all primers work the same. Pick the wrong one, and you’ll waste time and money. Here’s the breakdown.
Oil-Based Primer
Oil-based primers have been around forever. They’re tough, they block stains like a champ, and they work best on bare wood and metal.
But they come with trade-offs. They dry slowly. They smell strong and release more VOCs than water-based options.
If you’re dealing with cedar or redwood, oil-based is often your best bet. Those woods have natural tannins that will bleed through latex primer. Oil locks them in.
Latex (Water-Based) Primer
Latex primers are the go-to for most exterior projects. They’re low-odor, clean up with soap and water, and have way fewer VOCs.
Modern acrylic latex primers are flexible. That matters because your siding expands and contracts with the seasons. A primer that moves with it won’t crack.
Use latex on masonry, previously painted surfaces, and most wood. Just avoid it on tannin-rich woods unless it’s specifically formulated for stain blocking.
Shellac-Based Primer
Shellac is the heavyweight for stain blocking. Water stains, smoke damage, stubborn knots—shellac seals them all.
It dries fast, too often within an hour. If you’re on a tight timeline and need to cover serious stains, shellac is your friend.
The catch? It’s more expensive and has a strong odor. But for problem areas, it’s worth it.
Bonding Primer
Some surfaces are just plain slippery. Glossy trim. Galvanized metal. That shiny factory finish on your door.
Bonding primers are designed for exactly these surfaces. Products like INSL-X Stix or Sherwin-Williams Extreme Bond grip surfaces that regular primers can’t handle.
If you’ve ever painted something and watched it peel off in sheets, you probably needed a bonding primer.
Choosing Exterior Paint That Actually Lasts

The primer is the foundation. Paint is the protection. Here’s what to look for.
Go 100% Acrylic
This is non-negotiable. For exterior use, 100% acrylic paint outperforms everything else.
It stays flexible. It resists fading. It handles moisture without blistering. And it lets your siding breathe so trapped moisture can escape.
Cheaper paints use vinyl or styrene binders. They crack faster and fade quicker. Spend the extra money. You’ll thank yourself later.
Match the Sheen to the Surface
Satin and low-sheen finishes work best for siding. They hide imperfections and resist dirt.
For trim, doors, and shutters, go with semi-gloss or gloss. These surfaces take more abuse and need a finish that’s easier to clean.
Flat paint? Save it for ceilings. It doesn’t belong outside.
Think About Color Temperature
Darker colors absorb heat. That speeds up paint degradation. If you live somewhere hot, lighter colors will last longer.
But here’s something most people don’t think about: color affects how your home feels. Blues and greens read as calm and cool. Warm saturated hues feel energetic. Pick something that fits your style and your climate.
How to Apply Exterior Paint and Primer the Right Way

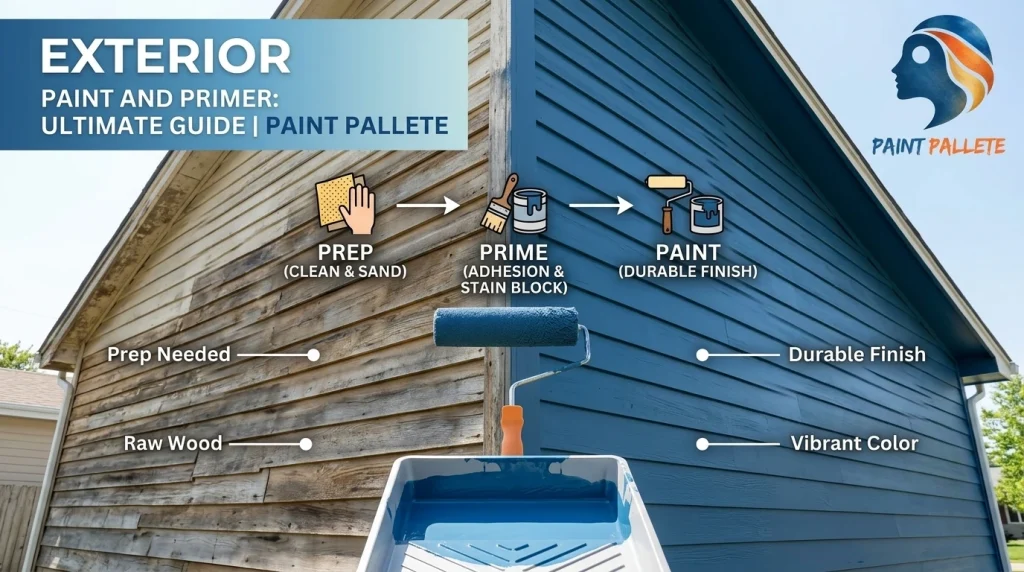
Preparation is everything. Don’t rush; otherwise, you will pay later. Here’s the process that works.
Step 1: Clean Everything
Dirt, mildew, and chalky Residue will ruin your adhesion. Wash the exterior with a pressure washer (1,200–2,000 PSI) or a garden sprayer with scrub brushes.
Got mildew? Mix diluted bleach and scrub it away. Rinse thoroughly. Then let everything dry completely.
Step 2: Repair and Scrape
Scrape away loose paint. Fill cracks with exterior-grade filler. Sand rough spots smooth.
Caulk around windows, doors, and anywhere water could sneak in. Use a paintable exterior sealant. This step prevents water damage down the road.
Step 3: Spot-Prime Bare Areas
Bare wood, exposed patches, metal, and stained surfaces—these all need primer.
If you’re doing a full repaint and the existing paint is in good shape, you might only need to spot-prime. But if you’re changing colors dramatically or switching paint types, a full prime coat is worth it.
Step 4: Apply Primer
Thin, even coats. Follow the manufacturer’s recoat times. Acrylic primers usually need one to four hours before topcoating. Cooler weather extends that.
Don’t rush. The primer needs time to cure.
Step 5: Apply Topcoat
Two thin coats of primer can beat one thick coat every time.
Maintain a wet edge to avoid lap marks. Work in sections. Don’t stop halfway through a wall.
Step 6: Watch the Weather
Ideal conditions? 50–90°F with surface temps at least 5°F above the dew point.
Avoid painting in direct sun, strong wind, or when rain is coming within 24 hours. Bad conditions cause blistering, poor adhesion, and uneven drying.
Mistakes I See All the Time
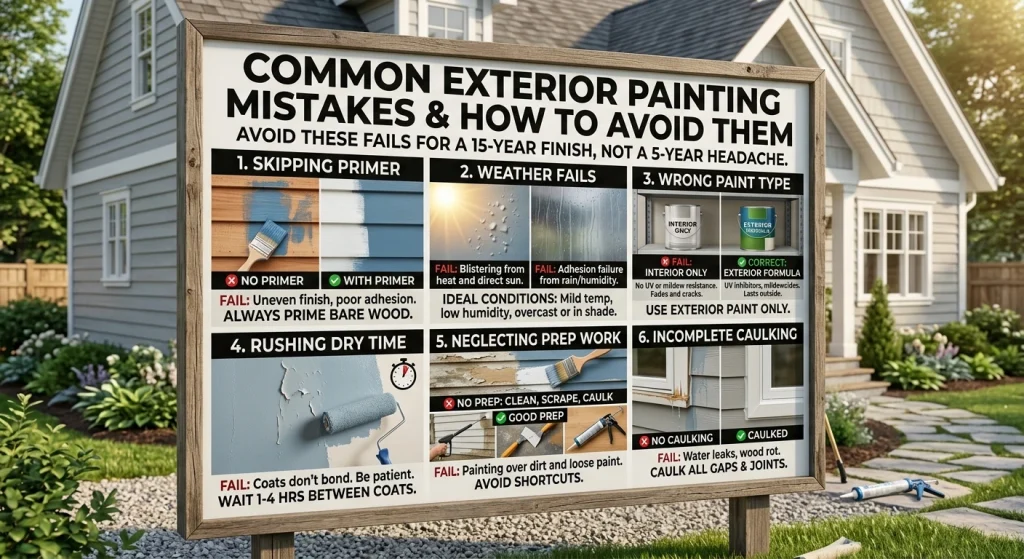
Skipping primer. Already covered this. Don’t do it.
Painting in the wrong conditions. Humidity, direct sun, and wind will wreck your finish.
Using interior paint outside. Interior paint lacks mildewcides and UV inhibitors. It will fail fast.
Not waiting for proper dry time. Rushing between coats causes adhesion problems. Be patient.
Skipping the prep work. Cleaning, scraping, and caulking aren’t fun. But they’re the difference between a finish that lasts five years and one that lasts fifteen.
Quick Tips from Someone Who’s Been There
- Choose low-VOC or zero-VOC paints. They’re better for you and the environment. Performance is just as good.
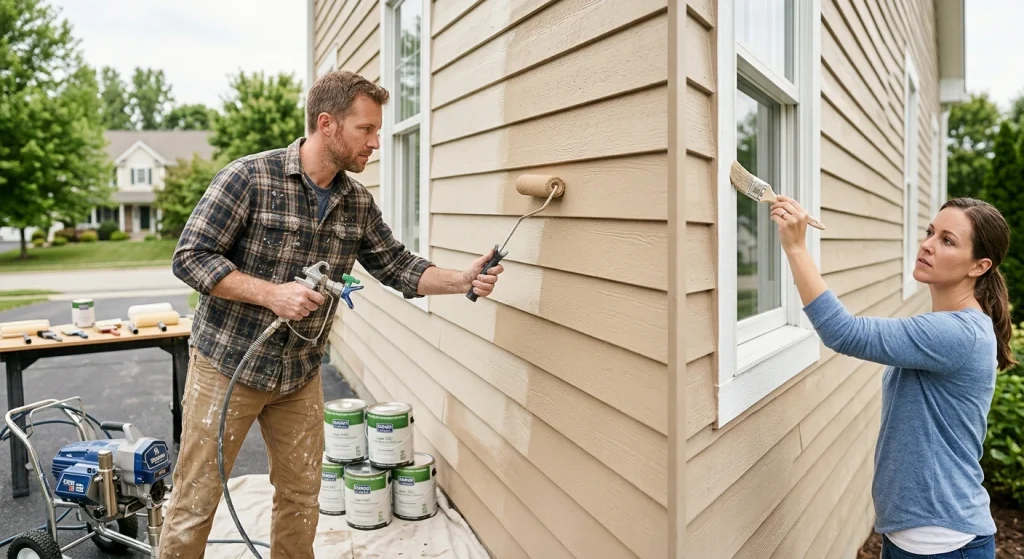
- Use the right tools. A 9–14 inch roller with a 3/8–3/4 inch nap for siding. An angled sash brush for trim.
- If you spray or back-roll. An airless sprayer is fast, but following up with a roller works the paint into the surface.
- Do a final walkthrough. Check for drips, missed spots, and thin areas. Clear these before everything cures.
One Last Thing
Exterior painting isn’t a weekend chore you want to repeat every year. Do it right the first time.
Primer is your foundation. Paint is your shield. Together, they protect your home from everything Mother Nature throws at it.
Take your time. Prep properly. Choose quality products. And maybe don’t listen to Dave.
For more painting guides and product recommendations, explore the rest of PaintPallete.